
On this page
The ParserBee Zapier integration connects ParserBee to thousands of other apps. A supplier invoice lands in your Google Drive folder, ParserBee reads it, and the invoice number, date and total appear as a new row in your spreadsheet. Nobody opens the file. Nobody types anything.
This guide walks you through the whole setup, start to finish. It assumes you have never built an automation before, so every step is spelled out.
TL;DR: Create a Parser Template in ParserBee, copy your API key and Template ID, then add the Extract Data From Document action to a Zap. Give it a link to the document and it returns the fields you asked for, ready to send anywhere Zapier reaches. Setup takes about ten minutes.
What you can build with the ParserBee Zapier integration
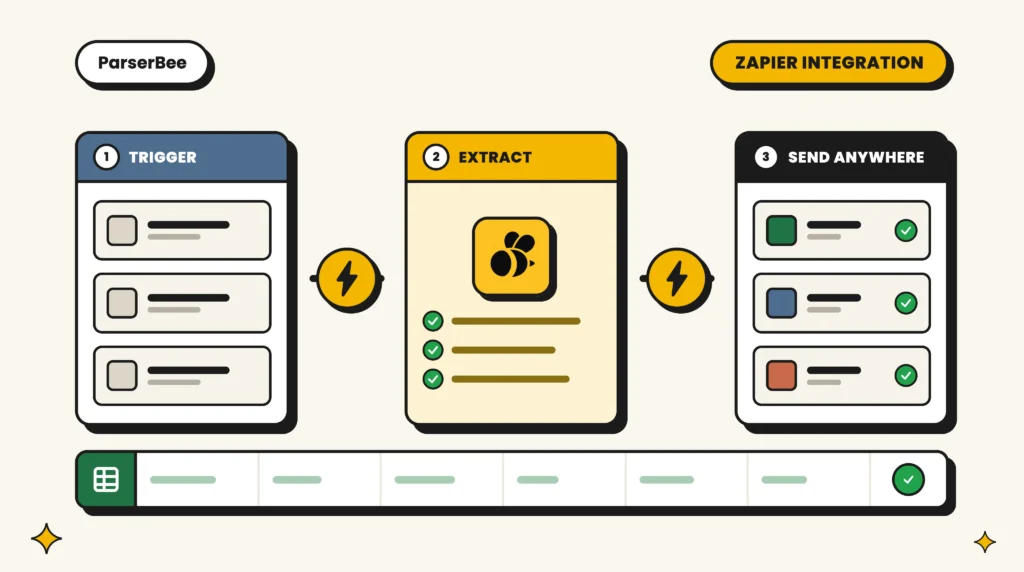
The pattern is always the same three steps: a document arrives somewhere, ParserBee reads it, the data goes where you need it.
- Invoices to a spreadsheet. New file in Google Drive, extracted by ParserBee, added as a row in Google Sheets.
- Invoices into your accounting tool. New file in OneDrive, extracted, created as a bill in Xero or QuickBooks Online.
- Purchase orders into your ERP. New file in OneDrive, extracted, posted to your internal system with a webhook.
- CVs into your hiring tracker. Candidate uploads a CV to your careers form, ParserBee pulls out name, email, skills and experience, and Zapier creates the Airtable record.
- Delivery notes into Slack. New file in cloud storage, extracted, posted as a Slack message with the reference number and quantities.
Before you start
You need four things to set up the ParserBee Zapier integration. All four take a few minutes to get.
- A ParserBee account. The free trial includes 25 pages, which is plenty to test a Zap with. Create an account.
- A Parser Template. This is your list of fields: what you want pulled out of every document, written in plain English. If you have not built one yet, see Step 1 below.
- Your ParserBee API key. This is how Zapier proves the request came from your account. Step 2 covers it.
- A Zapier account. The free plan is enough to build and test with.
Step 1: Build a Parser Template
A Parser Template tells ParserBee what to look for. Build it once, then every document of that type is read the same way.
- Log in to your ParserBee dashboard and click Templates in the sidebar.
- Click New Template. You have two fast options: upload one sample document and let our AI build the whole Parser Template for you, or start from one of the 83 ready-made templates in the Template Library (invoices, receipts, bank statements, purchase orders, CVs, and more).
- Check the fields, rename anything you want, and save.
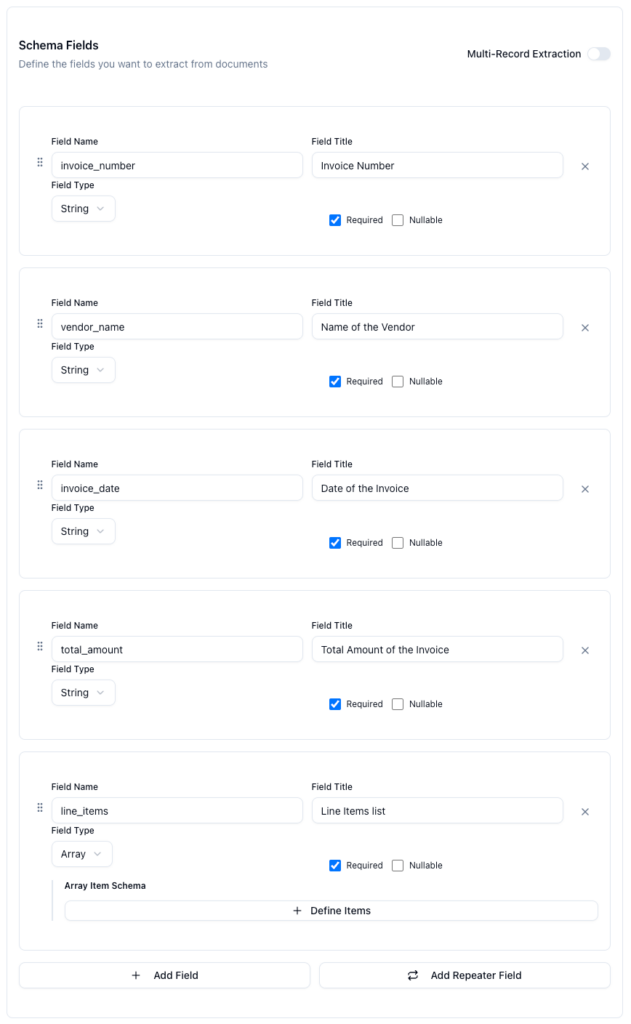
A tip that saves a lot of trouble later: write your field descriptions the way you would explain the field to a new colleague. “The final amount payable including tax” gets a better result than “total”. Dates are worth being especially clear about: say which format you want them in.
You can test the template on a sample document right there on the template page before you go anywhere near Zapier. Do that first. A template that works in the dashboard will work in a Zap.
Step 2: Copy your API key
- Go to Settings in your dashboard.
- Open the API Keys tab.
- Click the copy icon next to your key.
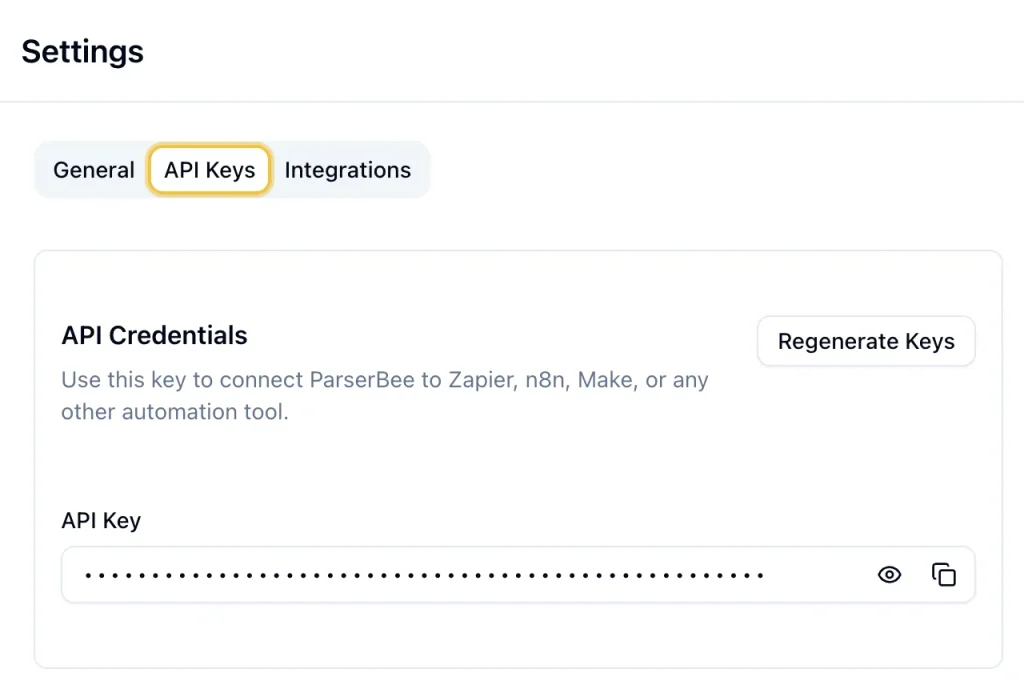
Your API key is a password. Anyone who has it can spend your page credits, so keep it out of emails, chat messages and shared documents. If you think it has been exposed, click Regenerate on the same screen. The old key stops working immediately, and you will need to reconnect ParserBee in Zapier with the new one.
Step 3: Copy your Template ID
Zapier needs to know which Parser Template to use on each document.
- Go to Templates and open the template you want.
- Near the top of the page, find Template ID and click the copy button beside it.
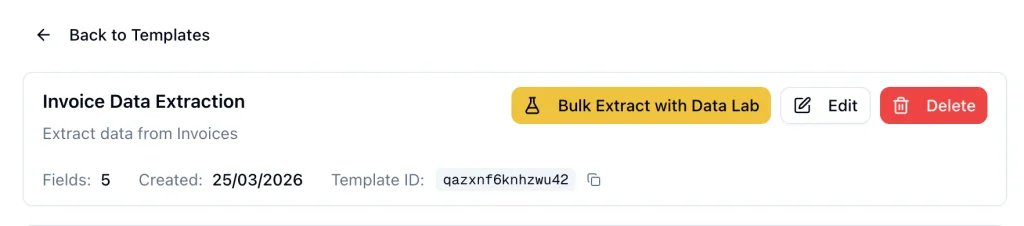
The ID is a short string of letters and numbers, something like abc123def456. Keep it handy alongside your API key.
Step 4: Connect ParserBee to Zapier
- In Zapier, click Create and start a new Zap.
- Choose your Trigger: the app that kicks the automation off. This is wherever your documents show up, for example a Google Drive folder, a OneDrive folder, or a form submission.
- For the Action, search for ParserBee and choose Extract Data From Document.
- Zapier asks you to sign in to ParserBee. Paste your API key and click Yes, Continue.
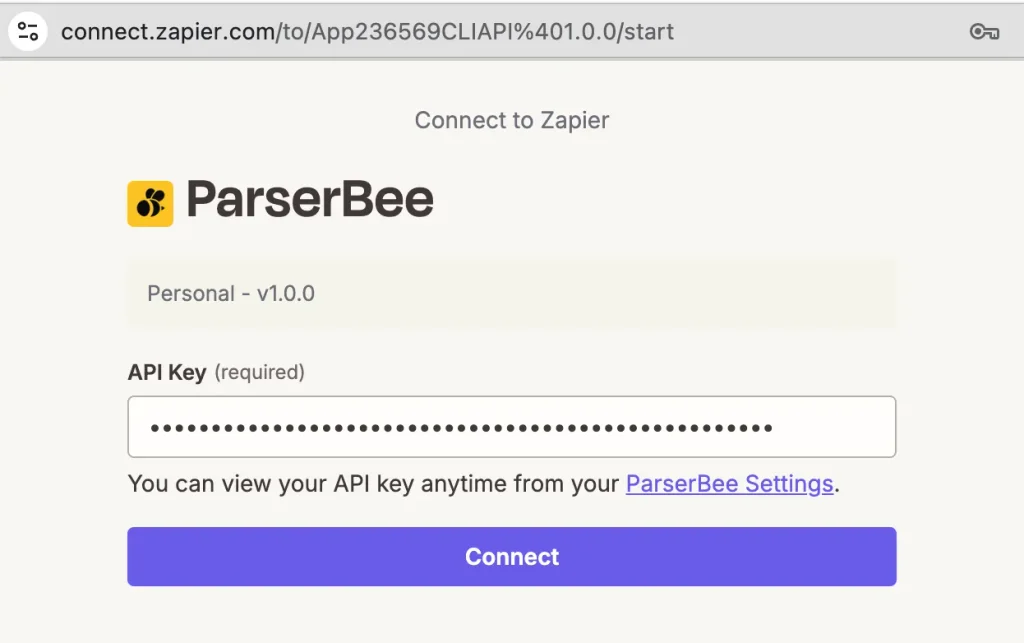
That connection is saved to your Zapier account, so you only do it once. Every future Zap can reuse it.
Step 5: Set up the action
The Extract Data From Document action has two fields.
| Field | What to put in it |
|---|---|
| Template ID | The ID you copied in Step 3. This decides which fields come back. |
| Document URL | A link to the document you want read. Click the field and pick the link coming out of your trigger step, for example the shared link from your cloud storage or the file URL from a form submission. |
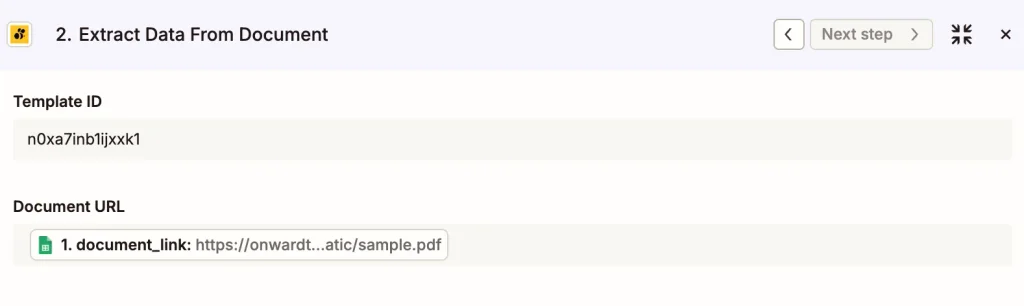
The Document URL has to be a direct link to the file itself. This trips people up more than anything else in the setup, so it is worth thirty seconds of attention:
- The link must open without a login. If someone who is not signed in to your account cannot open it, neither can ParserBee.
- It must return the document, not a preview page. A “view in browser” link from cloud storage usually returns a web page with the document embedded in it. That page is not your document, and ParserBee will read the page instead of the file.
- It should end with the file name, for example
.../invoice-2026-014.pdf. That is how ParserBee knows what kind of file it is dealing with.
Sources that work well out of the box: file upload fields in form tools (Typeform, Jotform, Gravity Forms, Tally), direct download links from cloud storage, links from your own systems passed in through a webhook, and any file already hosted on your website or CDN.
If your documents arrive as email attachments, you need one extra step in the middle: have Zapier save the attachment to cloud storage first, then feed the resulting direct link into ParserBee. If that is your workflow, email us at [email protected] and we will help you wire it up.
Now click Test step. Zapier sends one real document through ParserBee and shows you exactly what comes back. This test uses page credits, the same as any other extraction.
Step 6: Send the data where you need it
Add one more action to the Zap: the app where the data should land. Google Sheets, Airtable, Slack, your CRM, your accounting tool, or a webhook into your own system.
When you set that step up, every field ParserBee found appears in Zapier’s field picker, ready to drop into the right column or box.
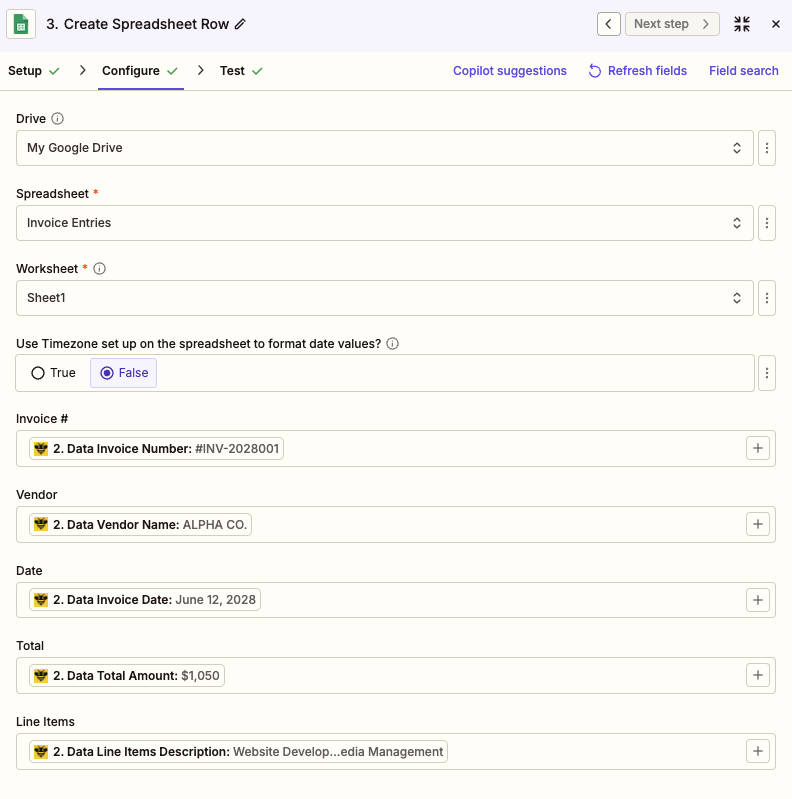
Here is everything ParserBee sends back after each document:
| What comes back | What it means |
|---|---|
| Your fields | Everything your Parser Template asked for, one entry per field. If your template is set to pull repeating rows (invoice line items, for example), you get a list of records instead of a single set. |
| Request ID | The reference for this extraction. Quote it if you ever contact support. |
| Pages processed | How many pages were read in this document. |
| Credits charged | Page credits used by this document. |
| Credits remaining | What is left in your account afterwards. |
| Processing time | How long the extraction took, in milliseconds. |
Click Publish and the Zap is live. From then on it runs on its own.
Ready-made workflows
Popular starting points for the ParserBee Zapier integration, each one a Zap you can build in about ten minutes:
- New Google Drive file, extracted by ParserBee, added to a Google Sheet
- New OneDrive file, extracted by ParserBee, created as an Airtable record
- New Google Drive invoice, extracted by ParserBee, created as a bill in Xero or QuickBooks Online
- Form submission with an attached document, extracted by ParserBee, posted to Slack
How page credits work with Zapier
The ParserBee Zapier integration costs the same as everything else in ParserBee: one page credit per page parsed, minimum one per document. A one-page invoice costs one credit. A ten-page contract costs ten.
Two things worth knowing before you turn a busy Zap on:
- Test runs cost credits. Every time you click “Test step”, a real document goes through.
- When your balance reaches zero, the Zap stops. Zapier shows the runs as failed and emails you. Top up by upgrading your plan and the Zap picks up again by itself, no reconnection needed.
Your balance is always visible in the dashboard sidebar, and you can see every extraction, whether it came from a Zap or anywhere else, under Activity.
Troubleshooting
These are the errors the ParserBee Zapier integration returns most often, what each one means, and how to clear it.
| What you see in Zapier | What it means | How to fix it |
|---|---|---|
| Invalid API key | The key was mistyped, or it was regenerated after you connected. | Copy the key again from Settings, then reconnect the ParserBee account in Zapier. |
| Insufficient page credits | Your balance has run out. | Upgrade your plan, or wait for your next billing cycle. Nothing else needs changing. |
| No active subscription | The account is not on a trial or a paid plan. | Check the Billing page in your dashboard. |
| Template not found | The Template ID is wrong, or that template has been deleted. | Copy the ID again from the template’s page. Watch for stray spaces at either end. |
| template_id is required | The Template ID field was left empty. | Fill it in. It is required on every run. |
| Either file or file_url is required | The Document URL field is empty, or the trigger step did not actually produce a link. | Open the trigger step’s test data and check there really is a URL in the field you mapped. |
| Invalid file_url format | What arrived in the field was not a full web address. | The link must start with https://. A file name on its own will not work. |
| Failed to process document | ParserBee could not read the document. | Three usual causes: the link needs a login, the link returns a preview page instead of the file, or the document is a password-protected PDF. Paste the link into a private browser window: if the file does not download, ParserBee cannot read it either. |
| The step times out | Very large documents can take longer than Zapier waits for a reply. | Split long PDFs, or run big files through Data Lab in your dashboard instead. |
| It runs fine, but fields come back empty | The document does not contain what the template asks for, or the field descriptions are too vague. | Open the template, make each description more specific, and test it again on the template page. |
Frequently asked questions
Does the Zapier integration cost extra?
No. The ParserBee Zapier integration uses the same page credits as the rest of ParserBee. You may need a paid Zapier plan if your workflow has more than two steps, but that is Zapier’s own pricing, not ours.
Which file types can ParserBee read?
PDF, PNG, JPG, WebP, HEIC (iPhone photos), DOC, PPT, PPTX, XLSX, CSV, TXT, RTF, ODT, HTML and EML. Scans and phone photos are fine. Word .docx files are not supported: save them as PDF first.
Can ParserBee start a Zap by itself?
Not yet. Today ParserBee is an action: something else starts the Zap and ParserBee does the reading. Triggers that fire when an extraction finishes are on the way.
Can one Zap handle several document types?
Each Extract Data From Document step uses one Parser Template. If you handle several document types, either build one Zap per type, or use Zapier’s Paths to route each type to its own ParserBee step.
Can I use more than one ParserBee account in Zapier?
Yes. Zapier lets you save several connections and pick which one each step uses.
What happens to my documents?
When you send a link, ParserBee reads the document from that link and keeps only the extracted data in your Activity log, so you can check any result later. Documents are never used to train AI models, and everything is handled in line with GDPR. See our Privacy Policy for the detail.
Do I have to use Zapier at all?
No. The ParserBee Zapier integration is only one way in. If you just need to process a batch of documents now and then, Data Lab in your dashboard does it with no setup: upload a stack of files, watch them get parsed, and export to Excel, CSV, PDF or Google Sheets. If you have a developer, our REST API works with Make, n8n, or your own code.
Still stuck?
Email [email protected] with your Request ID, which you will find in Activity in your dashboard and in the Zap’s run history in Zapier. That lets us look at exactly what happened on that particular run.
Was this guide helpful?
Ready to try it? Start with 25 free pages. No credit card needed.
Table of Contents
Purchase Order Automation: What It Is, How It Works, and How to Set It Up (2026)
Automation, data extraction, No Code, Purchase Orders
How to Stop Manual Data Entry from PDF to Excel (For Non-Technical Teams)
data extraction, Excel, No Code, PDF extraction
The Best Invoice Automation Software for Small Businesses in 2026
data extraction, Invoices