You have PDFs arriving every day. Invoices from vendors, receipts from team expenses, resumes from job applicants. Zapier handles everything else in your workflow. But getting the actual data OUT of those PDFs is where things break.
You have tried copy-pasting. You have opened each PDF, found the invoice number, typed it into a spreadsheet, and moved on to the next one. It works until you are doing it 50 times a day. The whole point of Zapier was to stop doing things manually.
This guide shows you exactly how to parse PDFs in Zapier and extract structured data automatically. This setup takes about 15 minutes once. After that, it runs on its own every time a new document arrives.
What You Will Build
By the end of this guide, you will have a fully automated Zapier workflow that does three things:
- Receives a document from an email attachment or Google Drive folder.
- Extracts specific fields like invoice number, total amount, vendor name, or candidate email using ParserBee.
- Sends the structured data to Google Sheets, Xero, Airtable, or whatever tool you already use.
Here is how the three tools divide the work:
| Tool | Role |
|---|---|
| Zapier | Orchestration. Watches for new files, triggers the workflow, sends data to the destination. |
| ParserBee | Extraction engine. Reads the PDF (even scanned ones), pulls out the exact fields you define. |
| Google Sheets / Xero / Airtable | Destination. Where your clean, structured data lands. |
Before and After
Before: A new invoice arrives in your inbox. You open the PDF. You find the invoice number, vendor name, date, and total. You type each one into a spreadsheet. You do this 30 times a day. It takes hours.
After: The invoice arrives. Zapier detects it. ParserBee reads the PDF and extracts every field. A new row appears in your spreadsheet within seconds. You never open the PDF.
Why Zapier’s Native PDF Tools Fall Short
If you have searched for “can Zapier extract from PDF” you have probably already discovered the answer is: sort of, but not really.
Here is what Zapier can and cannot do with PDFs today.
No native PDF field extraction
Zapier does not have a built-in action that reads a PDF and returns structured fields. There is no “Extract Invoice Number” step. There is no “Read PDF Table” action. It simply does not exist natively.
Formatter returns raw text blobs
Zapier’s Formatter by Zapier tool can convert basic digital PDFs to plain text. But the output is a single unstructured block. You get every word on the page dumped into one field. You still have to figure out which part is the invoice number and which part is the address.
Scanned documents are invisible
If your PDF is a scan (a photo of a printed document), Formatter cannot read it at all. It returns empty text. The same applies to photos of receipts or documents taken on a phone. Without OCR (optical character recognition), these files are just images to Zapier.
No way to target specific fields
Even when Formatter does return text, there is no mechanism to say “give me only the total amount” or “extract the vendor name.” You would need to write complex JavaScript code steps with regular expressions. That defeats the purpose for anyone who is not a developer.
The bottom line: If you want to extract PDF data to Excel or any structured destination using Zapier, you need a dedicated extraction tool connected to your Zap.
Method: ParserBee + Zapier (Recommended)
ParserBee is an AI-powered document parser that extracts structured data from PDFs, scans, and images. It has a native Zapier integration, so the connection is built right into Zapier. No coding, no webhooks, no API configuration required.
Here is how to set it up in four steps.
Step 1: Create a ParserBee template
Go to parserbee.com and create a free account.
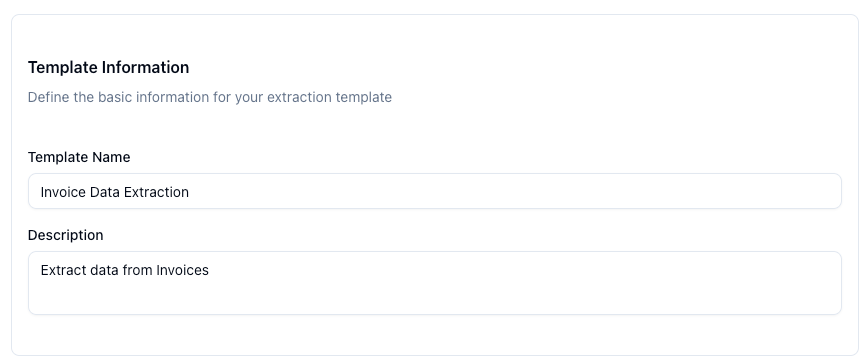
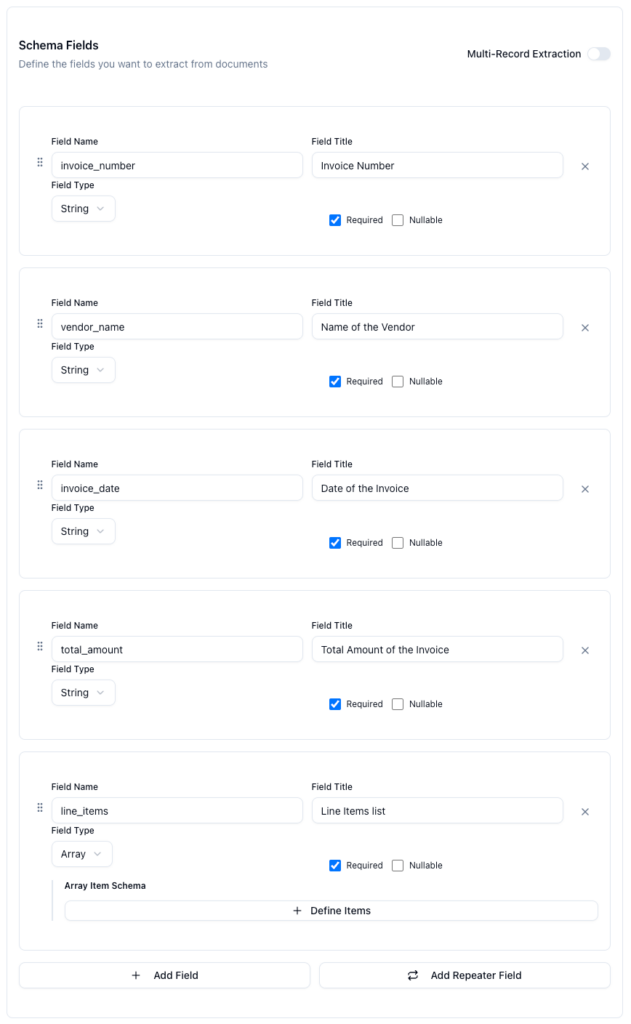
Once you are in the dashboard, create a new template. A template tells ParserBee which fields to extract from your documents. For an invoice, you might define:
invoice_numbervendor_nameinvoice_datetotal_amountline_items
Step 2: Connect your ParserBee account in Zapier
Open Zapier and create a new Zap.
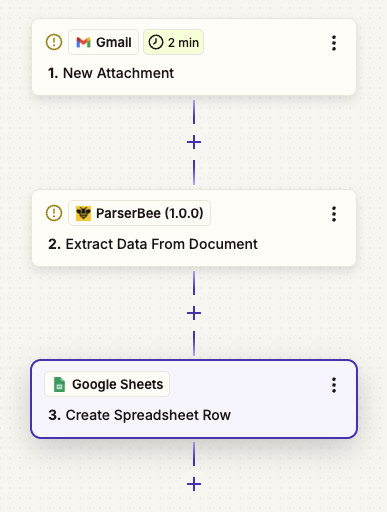
Trigger: Choose your trigger based on where documents arrive. Common options:
- Gmail → “New Attachment” trigger
- Google Drive → “New File in Folder” trigger
- Dropbox → “New File in Folder” trigger
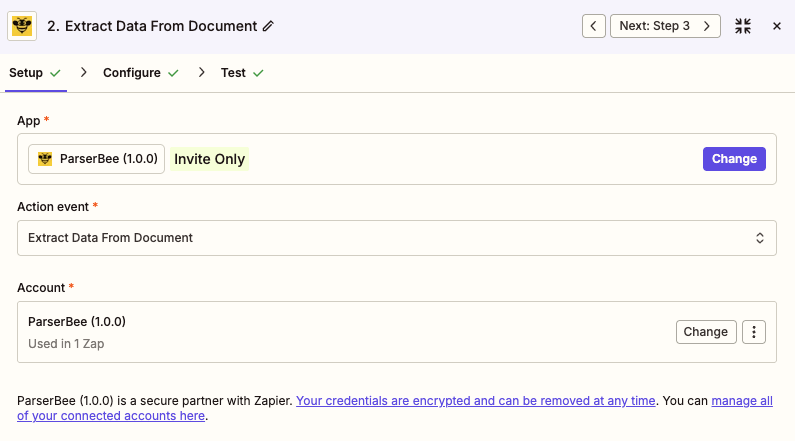
Action: Search for ParserBee in the Zapier app search bar. Select it and choose the “Extract Data From Document” action event. This action is built directly into Zapier – no webhook setup needed.
Note: At the time this article was written, the ParserBee Zapier integration is in Beta. If it doesn’t appear in the app search results, kindly send an email to [email protected] and we will invite you to provide access.
Zapier will ask you to connect your ParserBee account. Click Sign in to ParserBee and enter your API key when prompted. Zapier securely stores the connection so you never have to configure it again.
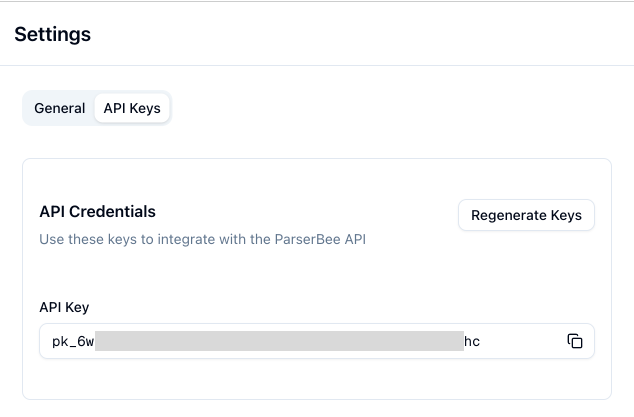
To find your API key, go to your ParserBee dashboard and navigate to Settings → API Keys. Copy your API key and paste it into Zapier.
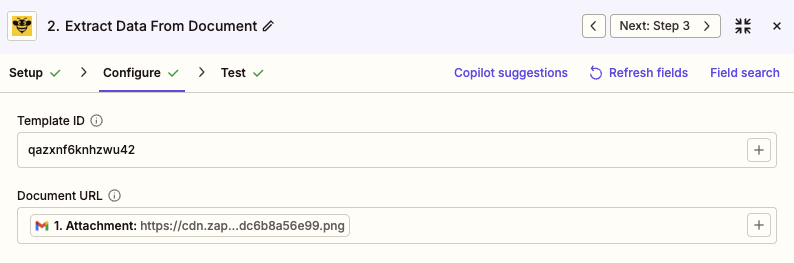
Step 3: Configure the ParserBee action
Once your account is connected, Zapier will show you the action fields:
- Template → Select the template you created in Step 1 from the dropdown
- Document → Map this to the file or file URL from your trigger step (e.g. the attachment from Gmail)
Click Test step. ParserBee will process the sample document and return a clean, structured response with every field you defined in your template. You will see the extracted values right inside Zapier, ready to map.
Step 4: Map the response to your destination
Add a final action step. This is where the extracted data goes. Choose your destination:
- Google Sheets → “Create Spreadsheet Row”
- Xero → “Create Invoice”
- Airtable → “Create Record”
- Excel (OneDrive) → “Add Row”
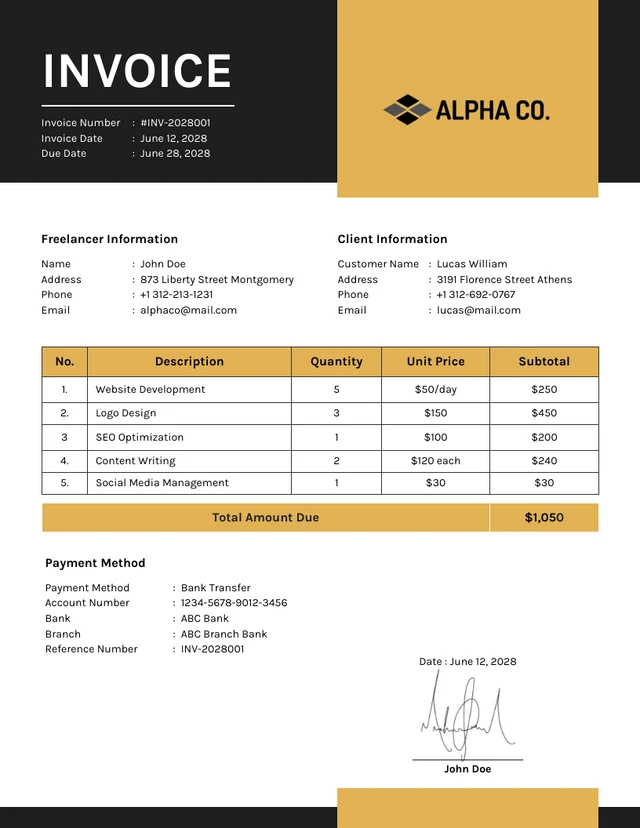
For this example we are using a sample invoice as below:
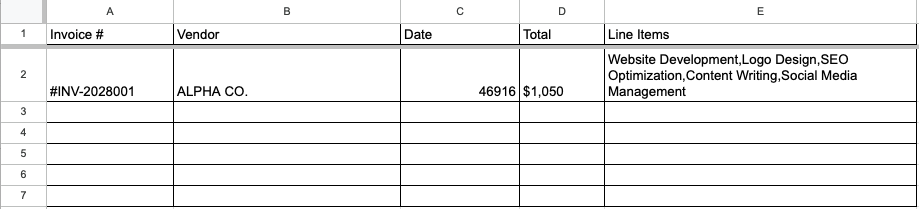
Map each ParserBee response field to the corresponding column or field in your destination. For example:
| ParserBee Field | Google Sheets Column |
|---|---|
invoice_number | Invoice # |
vendor_name | Vendor |
invoice_date | Date |
total_amount | Total |
Turn on your Zap. Every new document that arrives will now be parsed and routed automatically.

Not on a Zapier paid plan? ParserBee also has a Make.com integration that works the same way. See our Make.com PDF Extraction Guide for the full walkthrough.
Use Case Walkthroughs
Example A: Automated Invoice Processing
Scenario: You receive 20 to 50 vendor invoices per week via email. Your finance team manually enters each one into a Google Sheet for approval tracking.
The automated workflow:
- Trigger: Gmail → New email with attachment in the “Invoices” label
- Action 1: Webhooks by Zapier → POST to ParserBee API with the attachment URL
- Action 2: Google Sheets → Create new row with extracted fields
Fields extracted:
- Invoice number
- Vendor name
- Invoice date
- Due date
- Total amount
- Tax amount
Result: Every invoice that arrives in Gmail is automatically parsed. A new row appears in your Google Sheet within 60 seconds. Your finance team reviews the sheet instead of opening 50 PDFs.
Time saved: Roughly 8 to 10 hours per week for a team processing 200 invoices per month.
💡 Pro Tip: Set up a Zapier filter step between ParserBee and your destination to automatically flag invoices over a certain amount. For example, any invoice with
total_amountgreater than $5,000 can trigger a Slack notification to your finance manager for immediate review.
Example B: Resume Screening Pipeline
Scenario: You are hiring for three positions. Resumes arrive as PDF uploads in a shared Google Drive folder. You need candidate details in Airtable for your hiring team to review.
The automated workflow:
- Trigger: Google Drive → New file in “Resumes” folder
- Action 1: ParserBee (native Zapier integration) → Extract Data From Document
- Action 2: Airtable → Create new record in “Candidates” table
Fields extracted:
- Candidate name
- Email address
- Phone number
- Current company
- Years of experience
- Skills (as a comma-separated list)
Result: Every resume uploaded to the folder is automatically parsed. A new candidate record appears in Airtable with all key details pre-filled. Your hiring team can start reviewing without opening a single PDF.
ParserBee vs Native Zapier: Comparison Table
If you are wondering whether the Zapier Formatter is enough or you need ParserBee to parse PDFs in Zapier, here is a direct comparison.
| Feature | Zapier Formatter | ParserBee via Zapier |
|---|---|---|
| Structured JSON output | ❌ Returns raw text blob | ✅ Clean key-value pairs |
| Handles scanned PDFs | ❌ No OCR capability | ✅ Built-in AI-powered OCR |
| Handles photos (JPEG, PNG) | ❌ Not supported | ✅ Full image support |
| Custom field extraction | ❌ Manual regex required | ✅ Define fields in template |
| Multiple document formats | ❌ Digital PDFs only | ✅ PDFs, scans, images |
| Setup time | 5 minutes (limited usefulness) | 15 minutes (full automation) |
| Coding required | Yes (for field extraction) | No |
| Cost | Included in Zapier plan | Free tier available |
FAQ
Does this work with scanned PDFs?
Yes. ParserBee uses AI-powered OCR to read scanned documents. Whether your PDF was created digitally or is a scan of a printed page, ParserBee extracts the text and returns structured fields. This is one of the biggest gaps in Zapier’s native tools and the main reason people look for a Zapier PDF parser solution.
What Zapier plan do I need?
The ParserBee Zapier integration works on any Zapier plan, including the free tier. Because it uses a native app integration rather than Webhooks, there is no plan restriction. You can build and test your full workflow without upgrading your Zapier subscription. If you prefer a Make.com workflow instead, see our Make.com PDF Extraction Guide.
Can I extract data from images like JPEG or PNG?
Yes. ParserBee is not limited to PDFs. You can send JPEG, PNG, TIFF, and other image formats through the same API. This is useful for receipts photographed on a phone or screenshots of documents. The same template and field definitions work across all formats.
How do I handle documents that arrive as email attachments?
Use Gmail (or Outlook) as your Zapier trigger with the “New Attachment” event. In the ParserBee action step, map the Document field to the attachment output from your trigger. ParserBee downloads and processes the file automatically. No need to save the attachment to Google Drive first, though you can if you want a backup copy.
Is there a free tier on ParserBee?
Yes. ParserBee offers a free tier that lets you process documents and test your templates before committing to a paid plan. You can sign up at parserbee.com with no credit card required. This gives you enough room to build and test your full Zapier workflow before going live.
Conclusion: Which PDF Extraction Method Should You Use?
Here is the simple decision tree:
- Digital PDF and you only need raw text? → Zapier Formatter will work. But you will get an unstructured text block, not clean fields.
- Scanned PDF or photo of a document? → You need ParserBee. Zapier cannot read these at all.
- Need specific fields like invoice number, vendor name, or total? → Always use ParserBee. It is the only way to extract text from PDF in Zapier and get structured, mappable data back.
For most real-world use cases (invoices, receipts, resumes, purchase orders), option 3 is where you land. The 15-minute setup pays for itself the first day.
Get started free at parserbee.com — no credit card required.
Have questions about using ParserBee with Zapier? Reach out to us at [email protected] – we’re happy to help you set up your first flow.